
How to Setup iptv subscription?
tutorials on how to install and connect to our IPTV Servers in order to best enjoy our IPTV Services.
Vous venez d'acheter un boitier Android et maintenant, vous voulez installer IPTV sur Android Box ?
Vous êtes au bon endroit, voici comment installer IPTV sur une android box avec l'exemple du MQX 4K pro plus.
1. Connectez votre box à internet.
Votre Android box doit être connectée au Wifi via les paramètres.
Connexion comme un appareil classique, allez dans paramètres, choisir le réseau, insérer le code.
Dès que votre box est connectée à la wifi, le signe de la Wifi s'affiche en haut de la page d’accueil de la box.
Vous pouvez également connecter la box par Ethernet.
Allez dans les paramètres / Conexions et choisir Ethernet.
Dans ce cas vous aurez le signe "réseau" dans le panneau d'accueil.
Dans les 2 cas, il faut tester votre connexion.
Vous pouvez lancer internet sur la box ou YouTube pour vérifier qu'elle est bien connectée à internet.
2. Téléchargez l'application via l'email que vous avez reçu suite à votre commande.
Pour la télécharger, vous n'avez qu'à cliquer sur le lien et elle se télécharge automatiquement.
Pour obtenir un code pour un test IPTV de 24h sur Android Box cliquez ici.
Soit vous la téléchargez directement à partir de la box (meilleure solution)
Soit vous téléchargez l'application à partir d'un PC, vous copiez le fichier sur une clé.
Ensuite insérez la clé usb sur la box.
3. Lancez l'application "App installer" sur la box.
L'application va chercher sur la box et sur la clé et trouvez l'application à télécharger.
Cliquez sur l'application, cliquer sur "install" et l'application s'installe.
4. Allez dans "my apps" sur la box. Lancez l'application, un code vous est demandé.
5. Insérez le code que vous avez reçu par mail dans la section "activation code"
Appuyez sur OK
6. l'IPTV démarre et vous profitez du service !
Bon visionnage
INSTALLER UNE APPLICATION SUR UNE SAMSUNG SMART TV
- Allumez votre télévision. N’oubliez pas que votre télévision doit être connectée à internet, si vous voulez télécharger des applications
- Cliquez sur Smart Hub. Sur votre télécommande, pressez le bouton de plusieurs couleurs, au milieu. Ce bouton s’appelle Smart Hub. Avec certaines télécommandes, c’est un bouton avec le dessin d’une maison. Vous arrivez sur Mes programmes.
- Sélectionnez Samsung Apps. Avec les flèches de votre télécommande, dirigez-vous sur Mes applications, puis sélectionnez Samsung Apps en cliquant sur le bouton au milieu des flèches.
- Choisissez une catégorie d’applications. Dans le menu latéral gauche, vous allez apercevoir une liste de catégories d’applications. Sélectionnez une catégorie, comme les plus populaires, jeux, etc.
- Notez que la fonction Rechercher vous permettra d’inscrire, puis de trouver l’application que vous souhaitez.
- Trouvez une application. Dans la catégorie de votre choix, sélectionnez une application. La page de l’application s’ouvre.
- Appuyez sur Installation.
- cliquez sur Télécharger
- Installation
- Click sur Exécuter.
- Voilà, vous avez récupéré l’application sur votre télévision Samsung.
- Sachez que si l’application est payante, le prix sera affiché sur la page de l’application.
- Une fois le processus terminé, vous arrivez directement sur la page de l’application et vous pourrez commencer à l’utiliser.
COMMENT CONFIGURER SMART IPTV (SIPTV) SUR SAMSUNG TV OU LG TV

- Installation de l’application sur votre Smart TV
- Démarrer l’Application : On démarre l’application et nous arrivons sur l’interface de smart iptv, ici ce qui nous intéresse pour le moment c’est l’adresse mac de la smart tv.
- Synchroniser votre adresse MAC avec le lien m3u sur playlist url : Pour injecter vos flux iptv il va falloir vous rendre (http://siptv.eu/mylist/)
- Visionnez vos chaines.
- On redémarre l’application.
- Et nous arrivons sur la page d’accueil avec la liste de chaines.
If you have a Roku Device and wish to use IPTVXM
Instructions;
Press the Home button on your remote to open the main screen
Scroll down and select Streaming Channels
Scroll down and select the Personal Media category
Select the M3U Playlist Player (orange icon with small white triangle)
Press OK button to select the app
Select Add Channel to install M3U Playlist Player
From the Home screen select the M3U Playlist Player
Select New Playlist and type M3U Playlist URL (Provided after purchase)
Save playlist and let it load which may take a while to load and your done.
- install GSE IPTV PRO application on your device.
- Click ‘Setting’ on left top corner
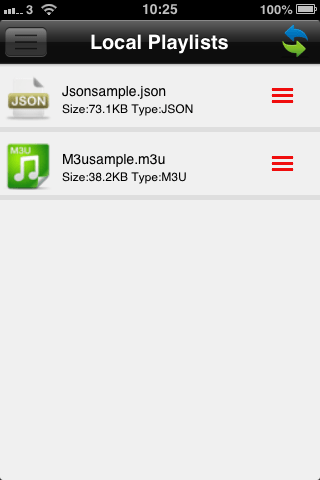
3. click ‘Remote Playlists’ menu
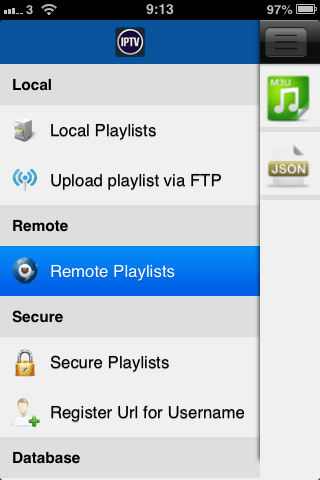
4. Click ‘+’ button to add IPTV provider
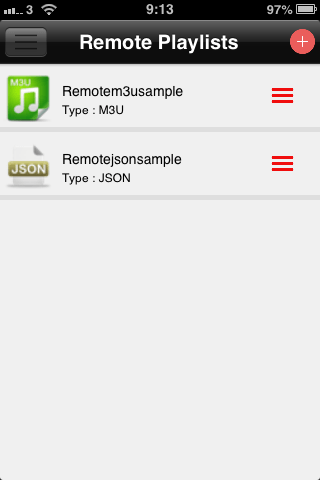
5. Click ‘Add M3U URL’ menu (Link which we Provide to you)
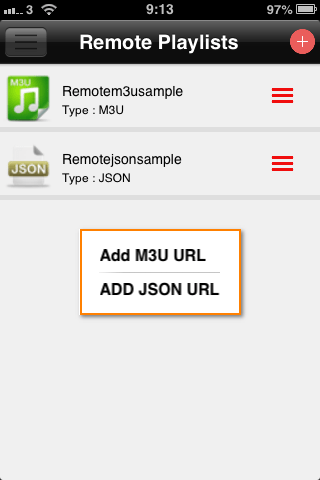
6. Set umbrellSharing.tv ( luxeiptv.fr ) as IPTV provider
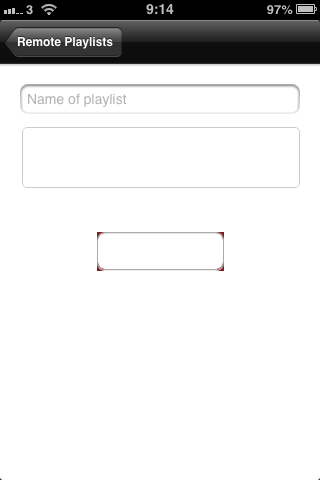
DONE.
STB Emulator basically clones the Mag’s interface and can be used on Android Devices or Windows using Android Emulators like Bluestacks.
Download STB Emulator from the Google Playstore. There are two versions; paid and free. The paid version is ad free.
Setup Instructions
Open App
Click Menu/Settings button on remote or double click with mouse and click icon on the top right hand corner of screen
A Menu will be displayed on the right
Click Settings
Profiles and Add Profile (a new profile will be created)
Select Profile Name and change to whatever you like Eg. IPTVXM
Click OK
Select Portal URL and enter the Server URL we provided
Click OK
Select STB Configuration
Click Screen Resolution and set to Auto
Select Mac-address and enter MAC Address.
Mac address for STB’s usually begins with 00:1A:79:XX:XX:XX. The X’s can be numbers ranging from 1-9 or Letters from A-F. This Mac address can be manipulated. The address you send us is the one that will be activated. if the Mac address you provided is already active then we will inform you so that you can change it.
After Mac address has added/changed
Exit to the initial screen
Open Menu Option to the right again and scroll down to Profiles
Select the Profile that was just created
Portal should start loading and your done!!!
First make sure you have a Updated firmware on your device.
You will need your m3u URL for Openbox, this will be emailed to you when order is processed
1. Open Intenet Browser
2. Copy and paste your m3u URL into the ADDRESS BAR and press enter
3. It will ask you to either save or save as
Choose SAVE AS and change the file name to WebTv
4. Copy the saved file from your computer to a USB stick then put the stick in the BACK of the Openbox
5. On the remote press the following:
– MENU
– Network Local settings
– Network App
– WebTv
– Yellow button to read from USB
– If it is works it will say success
Obtaining Mac Address from the device:
1) Let the STB Boot Up
2) Finish any update that it may find.
3) It will bring you to the server menu (where you enter portal information)
4) Press the Exit button on the remote and click on OK.
5) This will bring you to the main DOL screen, the MAC address in upper right corner
You will need the Mac address when subscribing to our service (if you choose to have it on the dreamlink box)
Once you have filled out a order form with us and your order has finished being processed you will need to setup your device onto our service.
Setup IPTVXM on DOL:
1) In Dreamlink On Line (DOL) go to Settings
2) Press the green button on your remote to pull up the edit option
3) for the portal name use “IPTVXM ”
4) for the portal URL use the links which have been sent to you by us.
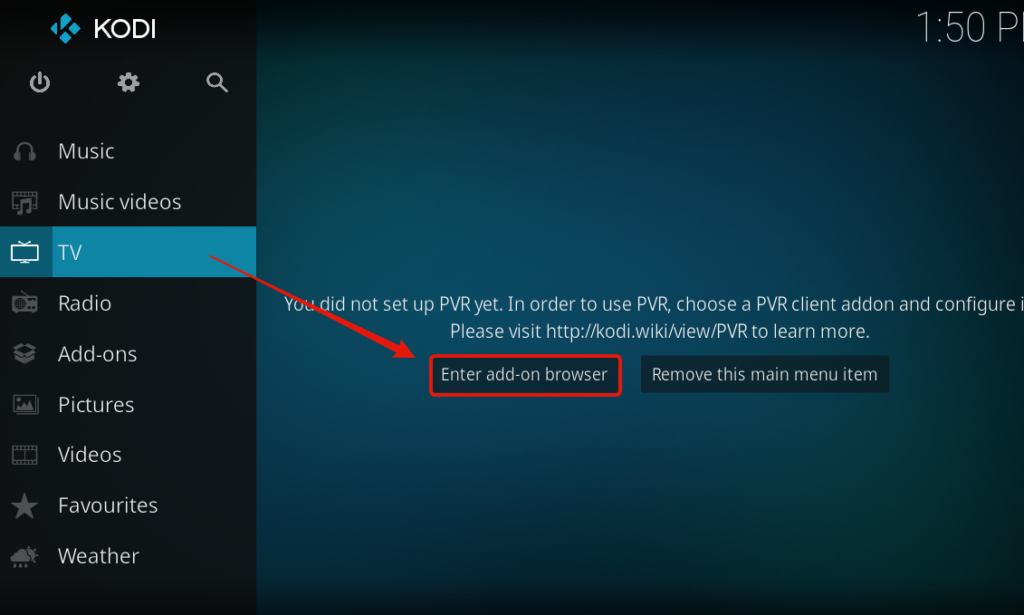
In this Tutorial we are going to use the newest version : Kodi v17.3 “Krypton”” First of all we have to choose our PVR client, to choose one Navigate to TV > “Enter add-on browser.
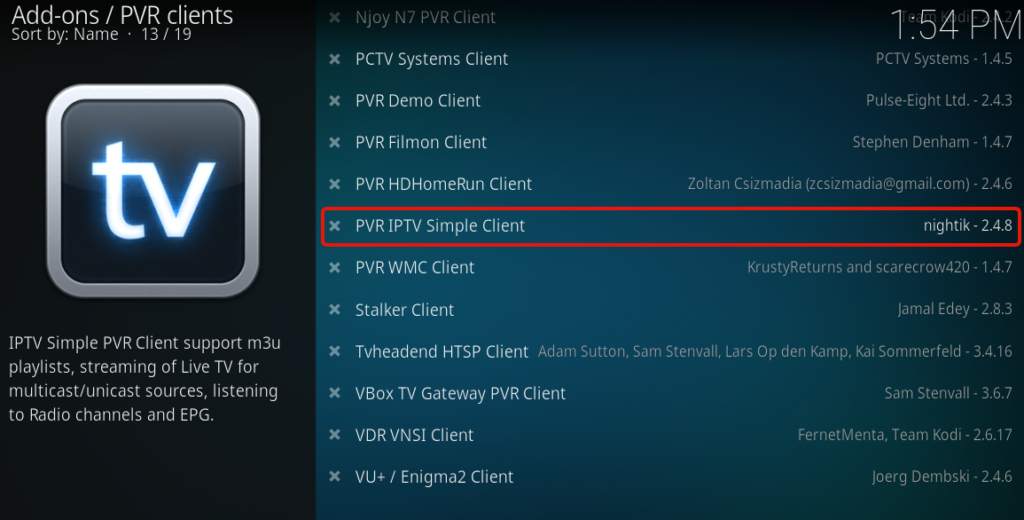
A window will pop up, here choose the “PVR IPTV Simple Client”
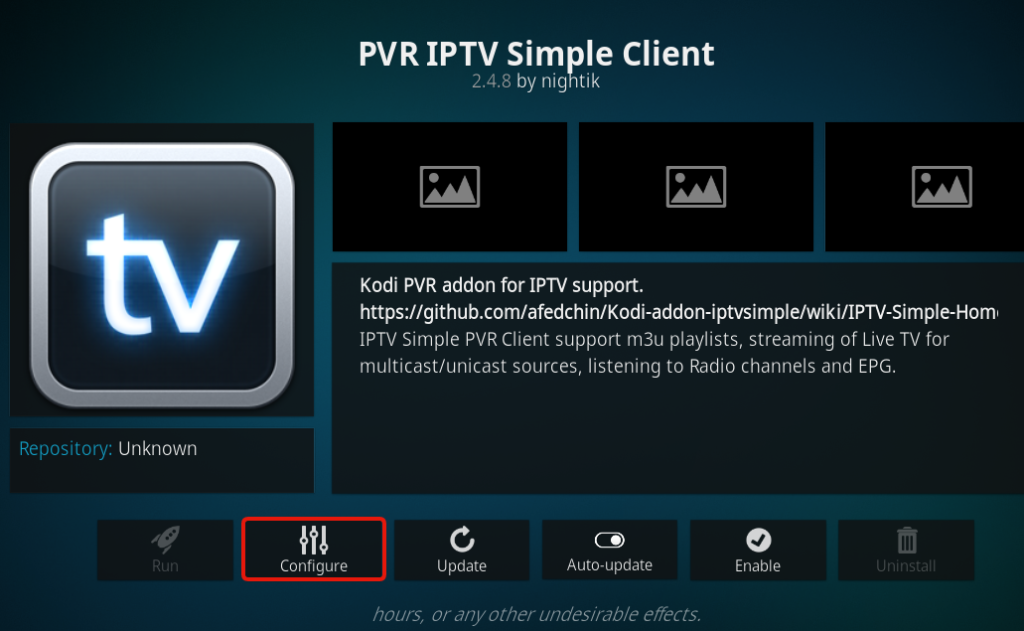
Before we enable the PVR Client we will have to configure it, to do so just click on “Configure”
Before we set the Play list url disable the “Cache m3u at local storage” Radio button, so we keep getting new TV Channels.
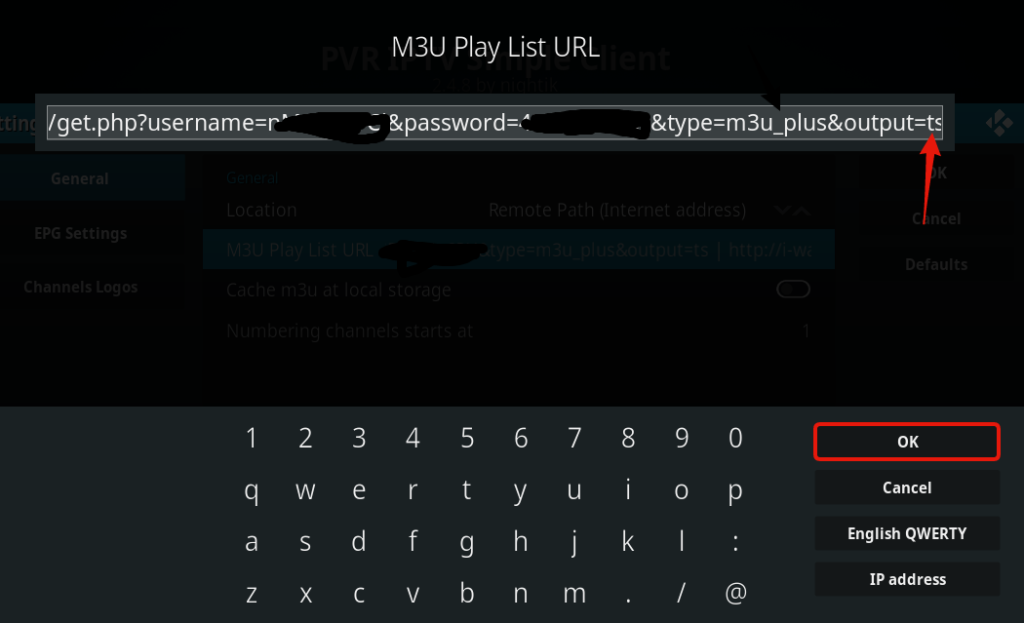
Now click on the M3U Play List URL Bar to add our m3u source.
Copy your m3u play list url you got from us and make sure the type is set to “m3u_plus” and the output is set to “ts” if you are done press “OK”
Now Navigate to the “EPG Settings” and click on the XMLTV URL Bar to set our XMLTV Url.
The EPG works like this : http://ipthost.com:2651/php?username=XXXX&password=XXXX
Replace XXX with your username and XXXX with your password which you can see in your m3u file which should look like this :http://ipthost.com:2651/get?php?username=YOUR-USERNAME-HERE&password=YOUR-PASSWORD-HERE&type=m3u_plus&output=ts
Once your done press “OK”
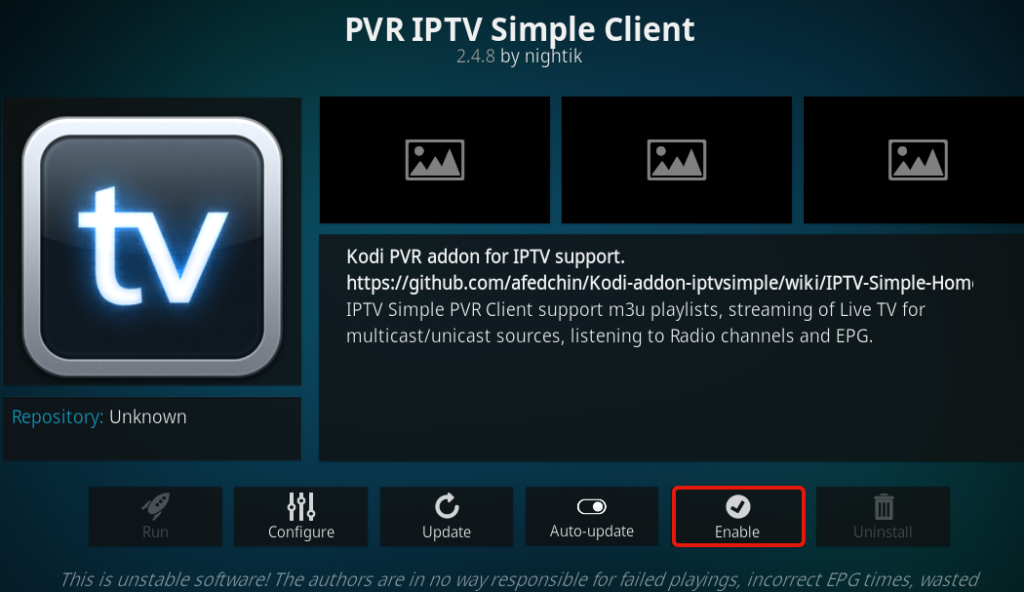
Double check if you have all the Settings correct.Now press “OK” to close the Settings Tab.
You can now enable the PVR IPTV Simple Client by clicking on “Enable”
Notice that a message will pop up telling us that the Channels are loaded.
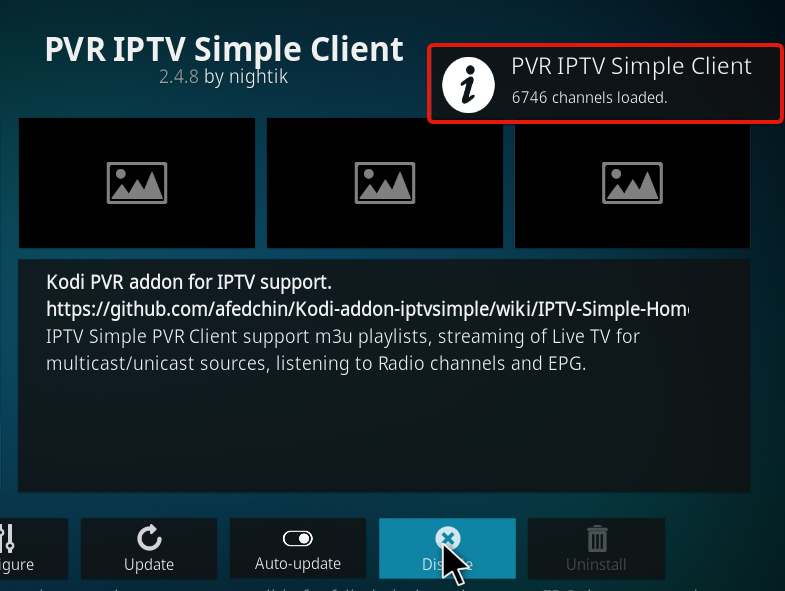
Let the Programm finish loading all the files, and then restart Kodi.
After your restart navigate back to TV and then to “Channels”
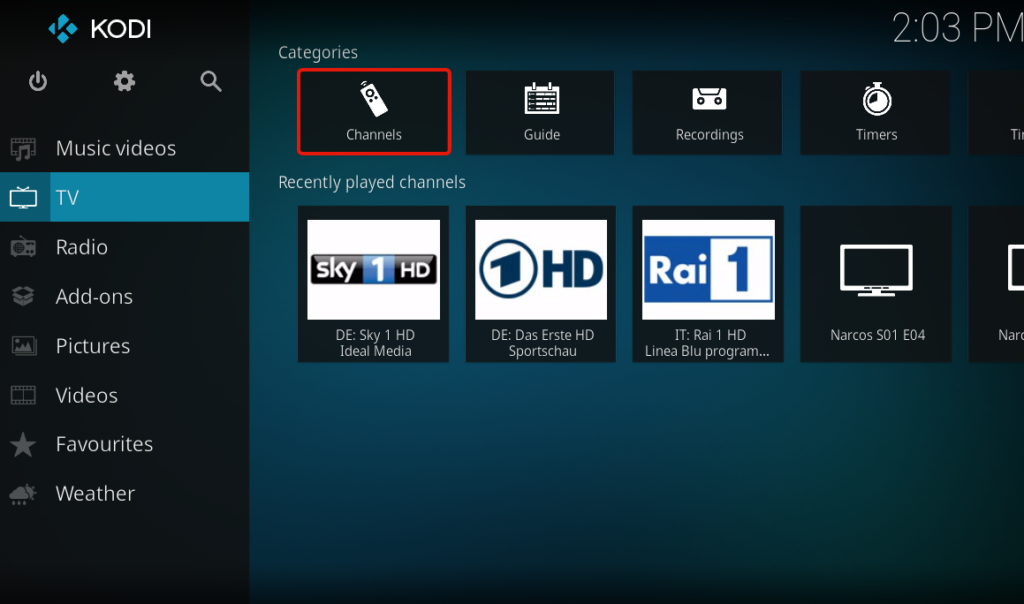
All Channels should be listed now, you can see a bar on the right side where you can see informations about the channels, what Show is playing, information about the Show and also how long the Show plays.
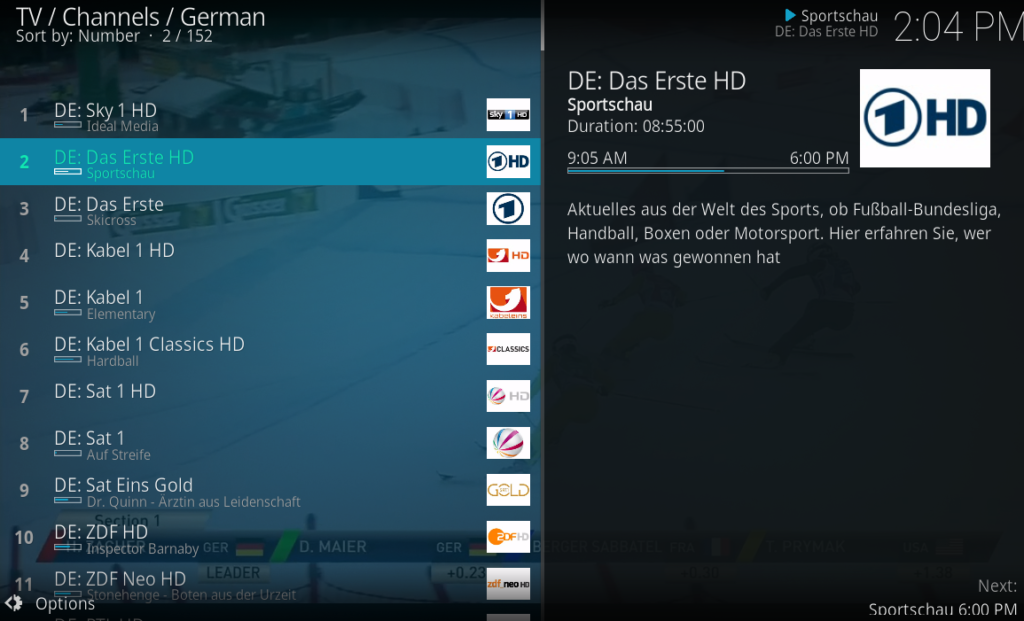
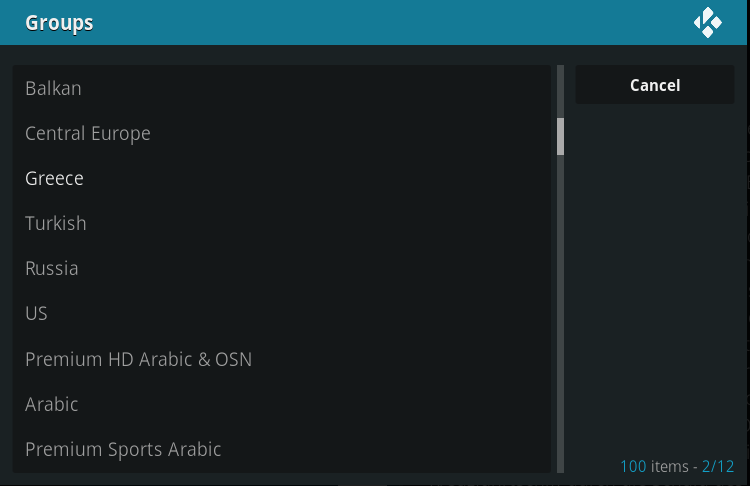
By clicking “LEFT” or pressing the “Options” button expanded options will show click on Group to filter the TV Packages.
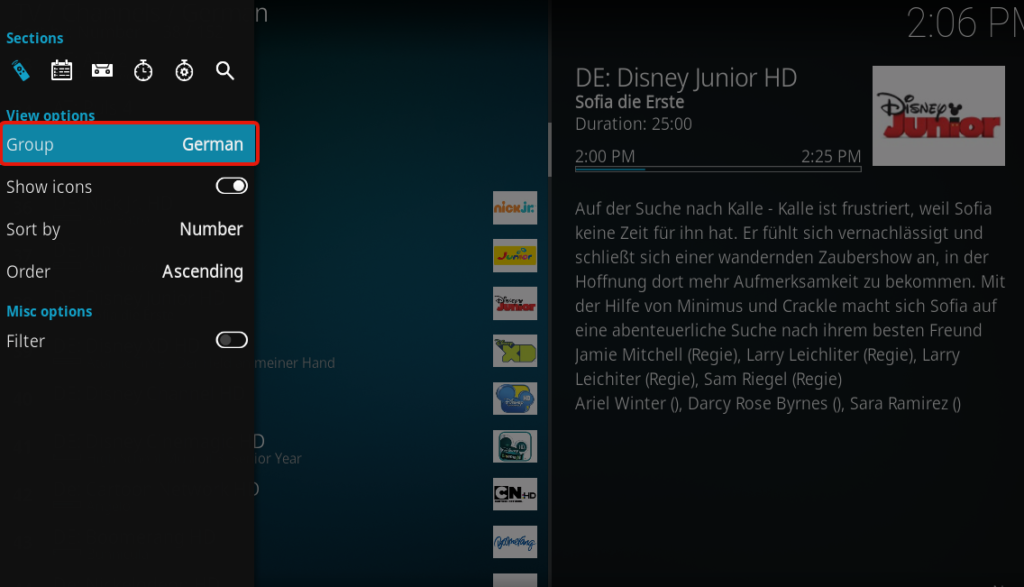
Here you can set what Package you want to display you can also use ALL Channels or choose VODS (Video on Demand) and pick shows like The Game of Thrones etc.
Done, you should now be able to watch iptv !
Please also check Media formats and codecs, supported by Android platform. If your stream doesn’t work in the app directly, it means it is not supported by native Android codecs, so you will have to use external app (check remote control commands below), which does.
Important 1! You need to install one of the media players available in Google Play to play videos in your playlist.
Some examples are VLC, MX Player etc. You can also use it as an external player for your streams.
Important 2! The Android version of the application is still in very early development stage, so it still doesn’t have all the feature present in the app on other TV platforms. All these features will be added gradually over time.
If you would like to test new features as they appear, you can apply for the Beta test by following the instructions given at this link. Turn on your TV (switch to Android TV home screen) and install the app from PC using your Google account by clicking Download it on Google Play link after you apply as a tester on the link provided above.
Loading your own playlist
The application does not include any channels, it is only a tool to watch your IPTV or OTT streams.
You can load your own IPTV playlist by following these instructions in my playlist upload section.
Remote Control functions
General remote functions:
- ОК – show channel list; show extra tools (press and hold); run archive with external app (press and hold)
- P+/P and Arrow buttons – navigate pages, groups and channels
- UP/UPx2 – show infobar/show programme description in play mode
- DOWN – channel history in play mode
- UP/DOWN – change volume (press and hold)
- LEFT arrow – previous channel (press and hold)
- RIGHT arrow – EPG (press and hold); EPG in programme information in channel menu
- Number Keys – direct channel selection
- “0” – previous channel
- INFO, INFOx2 – show programme information
- PREV. CH. – channel history
- MIC – change video aspect rati; add favourite
- MENU – EPG (Electronic Programme Guide); change video aspect ratio in archive
- BACK – hide channel list and info; go back to home screen
- EXIT – exit the app (required to reload playlist)
- PLAY – resume paused stream; open stream or archive in external player
- PAUSE – pause stream
- PLAY_PAUSE – pause/resume/restart stream (press and hold)
show groups in channel menu (press again to show All channels) - STOP – restart stream
- << – change audio track; switch groups in channel menu
- >> – change video aspect ratio; switch groups in channel menu
- ⇤ ⇥ – go to top or bottom of the channel list
- RED – change audio track; add favourite
- GREEN, GUIDE – EPG (Electronic Programme Guide)
- YELLOW – show/hide digital clock
- BLUE – show settings
NVIDIA Shield:
- A – same as OK on general remote
- B – same as RED on general remote
- X – same as BLUE on general remote
- Y – same as YELLOW on general remote
- Start/Options – same as PLAY (PLAY_PAUSE in archives) on general remote
- L1 (Left bumber) – same as INFO on general remote
- R1 (Right bumber) – same as GREEN on general remote
Setting User-agent property
You can try using User-agent property in your playlist if your provider requires it. See examples below.
| M3U | TXT |
| Usage | |
| #EXTM3U #EXTINF:0 user-agent=“Star Wars”,My Channel http://channel.URL#EXTINF:0,My Channel http://channel.URL|User-agent=Star Wars | epgCode,Channel Name,http://channel.URL|User-agent=Star Wars epgCode,Channel Name,http://channel.URL|user-agent:Star Wars |
| Examples | |
| #EXTM3U #EXTINF:0 user-agent=“Star Wars”,Brodilo TV http://brodilo.tv/channel.php#EXTINF:0,Brodilo TV http://brodilo.tv/channel.php|User-agent=Star Wars |
This setup tutorial will guide you through the setup tutorial for MagBox. In order for us to register your MagBox we will need you to send us your MagBox MAC Address, we will send you a URL to enter into your MagBox.
Go into your MagBox inner portal
Powercycle your MagBox and hold the ‘GEAR’ button on your remote control whilst the MagBox is booting up. The ‘GEAR’ button is in the middle of the second row of buttons, from the top of remote control.
Go to settings.
Whilst in the inner portal, press ‘GEAR’ button on the remote again in order to access the settings menu.
Note: There is also a settings menu ‘GEAR’ icon in the portal, this is the incorrect menu. You need to access the the settings menu from the ‘GEAR’ button on the remote control.
Select the ‘Servers’ option.
Enter the URL that we have sent to you into the Portal 1 URL or Portal 2 URL field.
You can connect a USB keyboard to the MagBox or use a virtual keyboard (there is a keyboard button on the remote)
Select and press the ‘OK’ button to save the changes.
Watching Live TV after initial setup
Turn on the MagBox.
Choose a channel to view.
Troubleshooting Live TV
If you have any problems viewing the Live TV Service please follow this recommended fix.
Reboot your MagBox and Router
